Tips on How to Eliminate Stress in High School

Hey everyone! It's been a busy school year for me so far. I'm a junior in high school and I've had to learn how to manage my time and eliminate stress that school, extracurriculars and other activities bring. I'm part of the International Baccalaureate program, and I am currently taking 8 IB classes. I'm also the leader of clubs; I am one of the officers of DECA and I am also the co-president of a human trafficking awareness club at my school. I am also a member of National Honor Society, IB Council, and an IB Leadership Group. I play recreational soccer and basketball with my friends, and I babysit and tutor kids to make money. I also like blogging obviously! My plate has been super full this year. A big change from my Sophomore year has been having 8 classes at a time instead of 4 or 5, that would change after one semester. 

Here are some of my tips for eliminating stress if you are in high school! 

First off, make a list of all the activities you have going on in your life and prioritize them. When prioritizing, think about what activities and aspects of your life are most important to you. If you have a lot of things going on in your life, than most likely cutting down will decrease stress. Figure out which things on your list aren't as important as others or are causing you this stress and cut back! I quit my job in September because I had too many things going on and not enough time for them all. I would leave school at 2:15, go to work at 4 and then come home as late as 10. Then I would start all my homework and studying. I also had certain days that I couldn't work because of clubs or sports. I decided to quit my job because it took up way too much time and wasn't as important to me as school and clubs. Lucky for me, I didn't need the money and I quit early enough that I my job never got too much in the way of my school work. Once I quit my job, a lot of time opened up for other things that I wanted to do.

Another tip I have for decreasing stress is to exercise. It's scientifically proven that your brain releases endorphins (think of it like happy hormones) while you exercise that make you feel calmer and happier. If you aren't a sporty kind of person, than try yoga. There are many different types of yoga, yoga that deals with more breathing exercises and yoga that is more focused on flexibility and strength. You also don't have to go to a studio to do yoga, you can just do it in your house and follow a video on YouTube. My favorite channel to watch for yoga is YogaWithAdrienne. 

This next tip goes along with exercising and it is to eat healthy food, drink plenty of water and spend time outside. Eating healthy foods like fruits and vegetables can put you in a better mood than eating unhealthy foods like chocolate or fries. Healthy food will give you energy and will overall make you feel more positive. Also, drinking a lot of water can reduce stress. It clears your mind and can have a restorative effect. It helps you to think more clearly and gives you energy. Spending time outside, whether it's reading a book or taking a walk will also clear your mind and is better for your overall well-being. It can definitely help if you are feeling overwhelmed of anxious about school or anything else you have going on.

Something that I struggle with is turning off screens. Everyone can get wrapped up in their technology at times and it's important that we power off. Reading is a great way to get your mind off of things and feel less stressed. If you are feeling overwhelmed, checking out a book at your local library that interests you and reading it.

My last and most important tip is to take time for yourself. Relax and spend time doing things you enjoy. Maybe make your room nice and cozy and listen to music or create a peaceful playlist. I make my room feel cozier by turning on fairy twinkle lights and throwing a bunch of blankets on my bed. You can also get a fireplace app on your laptop that will set the screensaver to a fireplace. You can also change the settings to make it crackle and sound like a really fireplace. I also write in a journal to feel less stressed. I constantly juggle things around in my head so putting my thoughts to paper makes my head feel clearer.

Those are my tips and tricks on how to feel less overwhelmed and stressed about high school and life in general. I hope you found this post useful!

Thanks for reading!
Thea
xx

Why You Should Shop Online + Useful Tips ♡


Ever since I was in middle school, I have always been a bargain hunter and a sales shopper. When I discovered shopping online it was like being introduced to a whole new world of commerce- all on screens! Shopping online is so great, because you can literally find anything you want online. If a product you really want isn't available at one store, you can easily find something similar at another store online in less than a minute. 

Another reason I love e-commerce is because it takes comparison shopping to a whole new level. Sometimes you can find the product on the store's website for cheaper, but you have to factor in shipping costs. Shopping the website will also give you more choices about your product though, like color. 

*TIP* Want free shipping? Pay for the product in store and they will order it online for you. They will give you free shipping since they didn't have the product in store and because the store is ordering the product for you. 

Another way to comparison shop is to compare different websites for the same product. If there is a specific product that is special to one store, than you can always find similar products online. If the product is made by a company that is sold at many different stores, than I suggest looking at the pricing at various stores online. Also check and see if the stores are having any special offers, such as giving away a free product along with your purchase. Some stores will also price match! You may pick a store because of the price, or because of a special service they offer when you make a purchase. You may also pick a store because of their return policy!

*TIP* Try googling your product and clicking on the shopping tab. You can find a bunch of different websites that sell the product you're looking for!

*TIP* Come across a sketchy website, or a website that you've never heard of? Search for reviews of the website online. You'll come across various blog posts, videos, etc. about the website which will help you determine the credibility of it. Never just rely on one source. Read multiple reviews of this site!

*TIP* Search for your product on Amazon! I love going on Amazon, because you can usually find things there for so much cheaper than the normal price! I literally go to Amazon to compare prices on anything and everything.

*TIP* Want something shipped to you fast and free? Join Amazon Prime! My family and I use it and absolutely love it. It is so efficient and quick, and you can also get special deals on your purchases.

Think about if you want this product new or used. Obviously some things you would definitely not want used, like underwear. But books on the other hand don't have to be new. If you think you might want this product used to save money, look at websites like Ebay, Amazon, Mercari and Poshmark. These websites sell new as well as used things.

*TIP* Look at the product's or the seller's reviews and pictures. If a seller has bad reviews, than I suggest not buying from them. Pictures are also very useful to look at, because you can see if the product is true to the description. You should also look at answered questions to read more about customers' concerns about the product. You should also ask your own question so that you can get an answer from either the seller or customers who have bought this product.

*TIP* Before buying an item, look at the section of the site where there are related items, or things that other customers have bought.

*TIP* Like listings on websites with used products to receive updates about discounts and comments on the listing. If not many people have liked the listing than comment with a lower offer. Usually the seller will lower their price a little bit!

*TIP* Use websites like Ebates to get cash back when you shop online! There are also a bunch of different other websites that offer you points that you can redeem for money when you buy items through their site. I'll leave some referral codes listed down below so you guys can save money!

REFERRAL CODES
Ebates // http://bit.ly/2bpV7v1
Poshmark (Get $5 off your 1st purchase with this invite code) // BUWHM
Mercari (Get $2 with this invite code) // QRNMHB
Shopkick (Get $2 with this invite code) // https://app.shopkick.com/r/1YMciV
Dote (Get free shipping on your 1st order + $5 with this code) // COYP

Hope you guys found this useful :)

Tips for Accessorizing: Stacking Bracelets ♡

 Long time no write! It's been a crazy few weeks with Spring Break, midterms and projects, but I am back with another post. Here are some tips for accessorizing with bracelets and stacking them! 


When I pair bracelets together, I pick 3 or 4 main colors to focus on. When picking my bracelets, I try to stick to these colors, so they will match and complement each other. The bracelets usually are other colors too, but I find that as long as most of my bracelets have one of the main colors then they will match. I also try to pick bracelets of the same style, such as the ones above that are cute and fun. I picked bracelets that were more casual with beads. My last tip is to pick bracelets of similar sizes to pair together. I find this tip extremely important, because when one bracelet is bigger than the others, it tends to slide over the smaller ones and get tangled up over them. You don't want to keep messing with them and fixing them the whole day!

Thanks for reading 

Disclaimer: All thoughts, opinions and photos are mine :)


How and Where to Shop for Inexpensive Shoes

Here is a list of some of my favorite online and in-store shoe stores, as well as how to shop for shoes, so you can get the best deals!


Inexpensive Stores

-DSW (www.dsw.com)
-Nordstrom Rack (www.nordstromrack.com)
-GoJane (www.gojane.com)
-LuLus (www.lulus.com
-T.J. Maxx (www.tjmaxx.tjx.com)
-Forever21 (www.forever21.com
-6pm (www.6pm.com)
-Poshmark (www.poshmark.com)
-Mercari (www.mercari.com)
-H&M (www.hm.com)

Tips for Shoe Shopping

-If you know you want to buy shoes from a website, you can sign up for their emails, and that will usually either give you a discount code or free shipping.

-Use your phone as a calculator, and calculate all the discounts of your shoes and the total cost of them, while you are shopping.

-Look at the back of stores, where the clearance or sale section is.

-Refine the price filter on your shoe searches on websites, so your only looking at shoes that are in your budget.

-If you are in-store, make sure to try the shoes on, because no matter how inexpensive they are, if they don't fit, then you're really not saving any money.

-If you are online, make sure to read the reviews of the shoes you are buying to make sure you are ordering the right size and to see how the quality of the shoes are.

-Don't buy something just because it is inexpensive; Make sure you will actually wear the shoes.

-If you like a pair of really inexpensive shoes, then try looking for them on a website that sells new and old clothes and shoes, such as Poshmark or Mercari. You can usually find the shoes cheaper and in very good condition or even new! I have bought things off of this website before, and you can money off your purchase with my referral code! You can get $10 at Poshmark using the code BUWHM, and $2 at Mercari using the code QRNMHB!

-If you buy shoes during their off-season (ex: sandals in Winter) then you can usually find them on sale.

Thanks for reading! Click here to read my inexpensive shoe haul to see how I saved over $100! I hope this helped you!

Disclaimer: All thoughts, opinion and ideas are mine

Superbowl 50- Essentials & Tips for Throwing a Superbowl Party (Panthers & Broncos)

Here are some really fun home decor things and food ideas if you are throwing a Superbowl 50 party in favor of the Panthers or the Broncos. I'm also going to give you some DIY ideas! Make sure to check out my Superbowl Outfit & Makeup Looks post too! Have a fun Superbowl Party!


Panthers Party


Broncos Party


-You can make football themed email invitations to invite your friends and family. I always use this website to make them, because it's free to use! http://evite.com

-To make pennant banners to hang up on your wall for free, just search on Google free printable Superbowl banners. Then you can print them out and hang them up on a piece of string. You can also cut out diamond shapes on a piece of construction paper that is the color of the team you are rooting for. Fold the diamond in half over string to make a pennant shape!

-I suggest buying a bunch of paper cups, napkins, utensils, balloons and other decorations from Party City, because they are super inexpensive and have a wide variety of things there for the Superbowl. http://partycity.com

-Instead of just having a regular bowl of chips, popcorn, or pretzels, you can make it more festive by buying M&M's and adding them in. If you are a Panthers fan, then you can mix in blue and brown M&M's, and if you're a Broncos fan, then you can mix in orange and blue M&M's.

-Instead or regular chocolate covered pretzels, you can add black and blue/orange and blue sprinkles. All you need to do is melt some white chocolate, pour it on the pretzels, pour the sprinkles on tops of the chocolate, and then wait for the chocolate to dry. Then once the chocolate is dry, you can shake off the excess sprinkles, and you are good to go!

Those are all my tips! Thanks so much for reading! I hope you have a great Superbowl Party :)


Disclaimer: All thoughts, opinions and photos are mine!

Product Review: 3-pc Benefit Cosmetics "Easy was a Crime" Deluxe Sampler Set

I recently picked up this Benefit Cosmetics Deluxe Set from Sephora last week. I'm a member of their rewards program, and I got an email that they changed up their rewards. This product was listed under their 250 points rewards, so I went to Sephora to redeem it. When I got there, the product wasn't displayed at the cashier desk in the case under their rewards, but when I asked the cashier about it, they went in the back and got one. Usually the Sephora rewards get picked up super fast, so I would definitely recommend asking someone that works there if they still have a specific reward that you want, because it may just be hidden behind the desk. 


This is the Benefit Cosmetics "Easy was a Crime she was guilty" deluxe sampler set. It retails for $15 at Benefit Cosmetics. You can get this product as a free gift with any $40 Benefit Cosmetics purchase at Ulta, but you can't get it at Sephora anymore under the rewards boutique. You can also buy this set for $24 at Benefit Cosmetics, but the mascara is full sized and the eyeliner and the remover are both fun size minis. 

This set includes sample sizes of products in the They're Real! collection. It has the They're Real! mascara, They're Real! Remover, and They're Real! Push-Up Liner. 

They are all mini sizes, so it is a perfect set to get if you want to try out the products in this collection. The mascara is 3.0 g, the remover is 7.5 mL, and the eyeliner is .10 g. There is definitely more product in the mascara and remover, than there is in the eyeliner, but you can still get a few uses out of it to see if you like it.

They're Real! Mascara


I really like this mascara! The mascara wand has plastic bristles for lengthening your eyelashes and picks up a lot of product with one pump. I had to wipe off the excess mascara around the tip of the wand, because a lot of product piles up there. It didn't add a lot of volume to my lashes, which is what I really like, but with one coat of mascara, it added A LOT of length! Usually when I put on mascara, I have to add a lot of coats to really lengthen my lashes, but this mascara works wonders! The domed tip of the mascara wand is supposed to fan out your corner lashes, and if you hold it vertically and stroke upward, it is supposed to curl and separate your lashes. I found that this mascara did separate my lashes, but didn't add volume. The mascara is very black and intense and has a more wet formula. Since it has a more wet formula, it takes a few minutes longer to dry and can get a little messy if you aren't careful enough. I would definitely recommend this product to anyone with short lashes that wants extra length without having to apply layers of coats. The full version of this product retails for about $24 at Benefit Cosmetics, and I think it's worth every penny! Pictures of me with this mascara are down below.

They're Real Push-Up Liner


I'm a huge fan of this gel eyeliner, because it's hard to use, and I don't really like the applicator. This is a matte gel black eyeliner, and it's also waterproof. The formula is very dark and matte, but I don't like the applicator, because it makes it difficult to apply the eyeliner. You take off the orange plastic part and squeeze the base of the tip, to push the gel liner to the tip. In the full size version of this liner, you twist the base to get the product to come out. When I used this product, little black chunks of eyeliner kept falling out and landing on my face, because it wouldn't apply smoothly to my eye. The plastic applicator moved around a lot and I couldn't get a straight line that was close to my eyelash line. The full version of this product retails for $24 at Benefit Cosmetics, and I won't be spending that much money on the full size of this product. I much rather prefer to use a pencil eyeliner or a gel eyeliner with an eyeliner brush to get a more accurate and defined line.

Pictures with Mascara & Eyeliner

Before-


After-


They're Real! Remover

This remover works pretty well, and got off all my eye makeup. It looks like a cream or lotion, but once you rub it over your eyes, it will get everything off. It didn't hurt my eyes or irritate them at all. This product worked really well, however I don't think it would be worth paying $18 for at Benefit Cosmetics for the full size version. I use coconut oil to take off my makeup, and I think it works just as well or even better than this remover.

Thanks for reading! I hope it helped you!

Disclaimer: All thoughts, opinions and photos are mine :)

How to: Ace Your High School Final Exams- Makeup, Outfit, Hair and Tips

I am in high school, and we just started taking our finals for our first semester classes. My high school's finals are after Winter break, so most students forget everything they've learned in their class in about 2 weeks. Also, a lot of students forget topics or things that they've learned during the beginning of the class. Here are my tips on how to ace your high school final exams! Hopefully these tips will work for you, and you will get a great grade on your test!


Makeup

I would keep your makeup for exams pretty casual and lightweight, because you don't want to be focused or worried about anything other than your exams. I recommend wearing a BB cream or tinted moisturizer, which will give you lightweight coverage but won't feel heavy like if you were wearing foundation. You can put concealer over any spots that you may want to give more coverage too. Putting concealer in big triangles under your eyes and blending will also brighten up your face and eliminate the appearance of dark circles under your eyes from all that studying. You should add a powder over your concealer and BB cream/tinted moisturizer, so it will stay in place throughout the whole day. I recommend the Laura Mercier Translucent Powder or the E.L.F. Cosmetics Tone Correcting Powder. Also, tightlining your lower waterline with a white eyeliner will brighten your eyes and make you look more awake. I don't recommend going too heavy on your eye makeup however, because you might want to put your head down on your desk and go to sleep after you finish your test, and your eye makeup would smudge. Make sure to put on some mascara, which will open your eyes, and some chapstick or lipgloss and you will be good to go! (Click here to check out my favorite makeup products of 2015!).

Outfit

Being comfortable is really important when taking tests, because I find if I am distracted or uncomfortable, I won't pay attention to little things or do as well on a test. Make sure the clothes you pick fit you right and feel good, because you don't want to keep fidgeting with your clothes. I like wearing leggings and a baggy shirt or jeans and a sweater. Also make sure to bring a sweatshirt with you, because sometimes the classrooms can be really cold in the morning. It all comes down to whatever you feel comfortable in though, because if you feel confident in what you are wearing, then it will make you more motivated.

Hair
I recommend putting your hair up if you have longer hair, because you don't want it to get in the way. I usually put my hair in a loose pony tail, but you can also do a half up, half down or just bobby pin the front strands of your hair back. I also wear my hair in a loose bun when I'm taking tests, because sometimes my hair will get caught in the bolts of the chair and will rip out...which is extremely painful!

Tips
1. Use released exams- I like to go online and find released final exams from the year before, so that I can practice taking the test. This will help you know what you need to study, and what the state or whoever makes your test thinks is important that you should know. Sometimes, the questions on the released exams are extremely similar to the questions on the exam you will take.

2. Break up your study sessions- Count up how many units or topics you have learned over the course of your class, and each day you study, you should study a new topic. If you try to study the night before, you will try to cram too many things in your brain, which will make you extremely stressed!

3. Go over notes- This seems pretty obvious, but read over the notes you have taken for the class. This will refresh your memory of the important things you learned. If you thought it was important enough to take notes on, then you should read it! Also, do a few problems from quizzes you have done or worksheets you have completed earlier in the year.

4. Get a good night's sleep- Don't study late into the night right before your exam! It's way better to get a good nights sleep and be well rested. Do things that will help relax you like reading a book and lighting a candle.

5. Eat healthy- Make sure to eat a good filling breakfast, so you aren't hungry during the exam. Also, make sure to bring water to your exam if you can, because water will clear your mind and help you be more focused. Also chew a piece of gum during the exam, because studies have shown if you chew a piece of gum while you're studying and then chew the same flavor while taking your test, it will help you remember things from when you were studying.

Thanks so much for reading :)

Disclaimer: All thoughts and opinions are mine. I made the pictures using Polyvore. 


Tips for How to Start off the New Year Right for 2016

Here are my tips of things you should do to make this year great! These tips will help you with your New Year's resolution or any of your goals in general. They will also just help you have a happier year in general! 


Tip 1: Resolutions
Everyone always makes unrealistic resolutions for the new year. After about a week or two, those resolutions end up forgotten and in the garbage. In order to successfully carry out your resolution for 2016, you need to make sure it has certain characteristics. It must be specific, measurable, attainable and of course, realistic. If your resolution isn't any of those things, than you may as well not even make one. They need to be specific, because if that will ensure that you know exactly what your goal is, so you can work at getting closer to it. You also need to be able to measure your goal, because that's how you will know if you have reached it or not. Of course, your goal or resolution must be realistic and attainable, because it needs to be something that you can actually accomplish. It must be within your grasp, because if it isn't, you won't work towards achieving it.

Tip 2: Inspirational Board

This is a collage I made a few years ago, with some of my favorite celebrities, makeup and fashion items on it. Making a collage of things that inspire or motivate you can help you to reach your goal or resolution for the new year. You can cut out pictures and words from magazines or from the Internet of things that will convince you to achieve your goal. Make sure to put this board up where you will look at it often, like on your wall or on your desk.

Tip 3: Happiness Jar

Write things that made you happy or memorable things that happened on little slips of paper every day in 2016, and put them all in a jar. Fold up the slip of paper and write the date on the side of paper showing. You should have 365 slips of paper by next year, and you can read them all to remember all the happy things that the previous year brought. You can also read the slips of paper whenever you are feeling sad or need a jolt of joy.

Tip 4: Write in a Journal

Writing in a journal every day is a great creative outlet, and lets you rewind through your day at night. Writing all your thoughts at night before you go to bed can also help you have a better night sleep. It's also fun to look back on your entries in the following year, to see what you were doing or thinking about on that very day the year before. 

Tip 5: Organize Your Room
Organizing your room will give you a fresh start to the new year. This will make you jump into the new year already feeling organized and on top of everything! You can also make a cozy corner in your room, where you can light candles, decorate with pillows and blankets, and put your favorite books or magazines. 

Thanks for reading! I hope you have a great 2016!


Disclaimer: All thoughts and opinions are mine! I take credit for all the photos except for the one of the fireworks, which was from Google images. 

Tips on How To Organize Your Suitcase and Make Traveling Easier

I am actually flying to London tomorrow over Winter break, which is really exciting! My family and I will be in London for about a week, and we will be visiting a lot of tourist attractions, as well as just relaxing. Here are my tips for organizing your suitcase and make traveling easier.


Tip 1: Pick the right suitcase


I'm bringing a suitcase similar to the one shown in the top picture for my trip to London. I'm going to check my  suitcase on the plane, which means it will be stored on the bottom of the plane where they keep bigger luggage. A suitcase similar to the one on the bottom picture would be good if you're only going somewhere for a few days, and it would be able to fit on the plane in the overhead compartments. If you are going to bring a suitcase with you on the plane, I strongly recommend to bring one with 4 double wheels (or 8 wheels), because that means the suitcase will roll side to side, as well as forwards and backwards. Then, if you need to walk through narrow spaces, such as an airplane aisle, you can turn your suitcase (handle is perpendicular to your body) so that the thinner side can move easily through, without getting caught on a chair.

Tip 2: Put a luggage tag on your suitcase


Put a luggage tag on your suitcase with your name, phone number, and address so that if you ever lose your suitcase, people can easily contact you. Also, luggage tags help you identify your bag at baggage claim, if you have a similar bag as someone else. If your suitcase is plain, put a piece of ribbon or something else that sticks out from other people's suitcases so you can find your bag at baggage claim. 

Tip 3: Make a packing list

If you write down everything you are going to pack, then you can easily check to see if you forgot to pack something. It will keep you more organized, and can help you limit the amount of items you bring, so you don't pack too much.


Tip 4: Roll your clothing

Rolling your clothing allows you to have more space in your suitcase for other things that you can't compress, such as shoes and cosmetics.

Tip 5: Organize your clothes

Make different areas for your clothes. Have an area for pajamas and underwear, casual clothes, and dressy clothes. This will help you keep your suitcase organized, so you know where to look when picking out your outfit on your trip. 

Tip 6: Separate Toiletries and Cosmetics

Put your toiletries and cosmetics in different bags, so if one of your toiletries leaks, it won't get all over your makeup.

Tip 7: Eliminate Makeup from Cracking or Leaking

Put a cotton pad in your powder compact, which will stop the powder from cracking. To eliminate leaking from liquids, take off the cap, put a piece of plastic wrap over the opening, and then screw the cap back on.

Tip 8: Use Pockets

Store things that you use frequently in the outside pockets of your suitcase, so they are easily accessible if you need to get something quickly.

Tip 9: Bring ziploc bags


If you are bringing your suitcase with you on the plane, then bring extra ziploc bags, just in case all your toiletries don't fit in one or if you forget to put your toiletries inside of one. These will come in handy at the security gate!

Thanks so much for reading! Leave comments and subscribe to my email list to get notified when I post :)


 Disclaimer: This blog takes no credit for the pictures used. 


Product Review: Conair Instant Heat 1-1/4 Inch Curling Iron & Tips on Curling Hair

Product Information for Model CD82PCS
-Conair Curling Iron 
-multi-layer technology for even heat distribution
-smart technology keeps barrel at a consistent heat
-unique button design prevents accidental shutoff
-turbo heat gives a burst of heat at the touch of a button
-dual voltage
-30 second heat-up
-25 heat settings
-on/off indicator light
-extra-long cool tip
-safety counter rest
-auto off

My Opinions

I really like this curling iron because of the cost and the quality. I bought this curling iron for $12.99 at Target, and I decided on a 1-1/4 inch curling iron because I have long, thick hair. This iron is perfect for loose bouncy, beachy waves. I wouldn’t recommend this iron to people who have thinner hair or who want small, tighter waves. The plastic packaging was difficult to get off (I had to get really big scissors).  I really liked that the curling iron had a safety counter rest, so that when the iron is heating up, I don’t damage any of my counters. The heat settings let you choose the right temperature for your type of hair, so you don’t have to add ore temperature than is needed. Since I have thick hair, I use the heat setting 20, but they have a very wide range of heat settings. The auto off is an also very important feature that I look for in hair appliances, because it ensures that your hair appliance won’t burn your house down if you forget to turn it off. Also, it’s great that this curling iron has dual voltage, because I sometimes travel out of the country (I am going to London over Winter break), and it’s a huge hassle to have to worry about bringing wall adapters for your electronics. The barrels are nice and smooth, and don’t snag on my hair.


Tips on How to Curl Your Hair

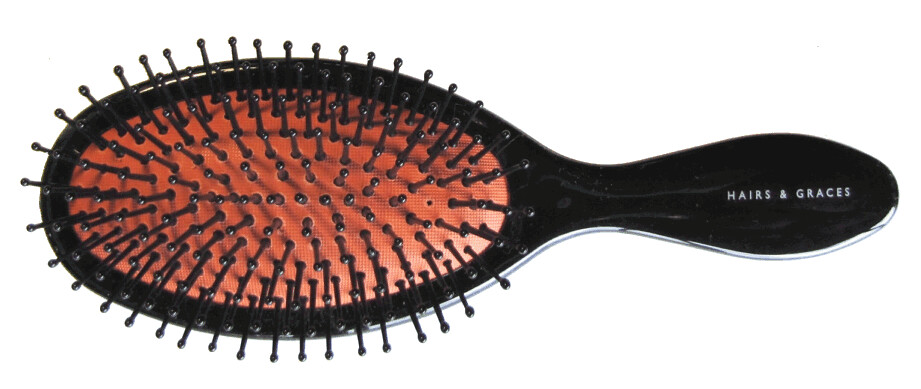
Step 1: Brush out all your hair, so that there are no knots or tangles. This is important so that your hair won’t snag or tangle while it is being curled. Turn on your curling iron and set it to the right temperature setting.


Step 2: Make sure to use heat protectant on your hair, to ensure that your hair isn’t damaged by all the heat you are about to apply to it. This is the TRESemme Heat Tamer ($3.99).
Step 3: Split your hair into 2 or 3 layers depending on the thickness of your hair (I usually do 3 layers). Gather your top layers, make a bun on the top of your head and tie it with an elastic or use a butterfly clip.
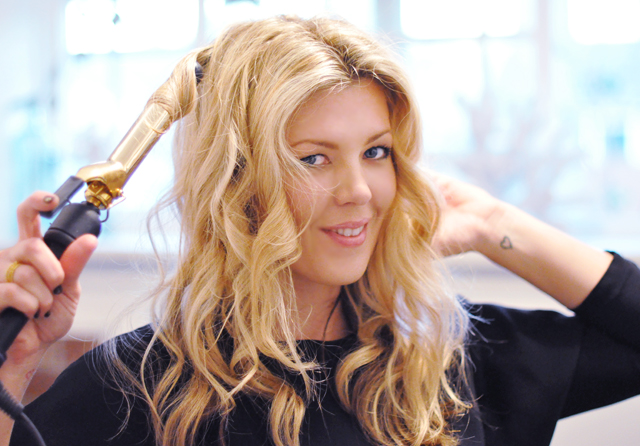
Step 4: Starting with the back of your head, take a 1 inch section of hair and clasp the end of your hair with the iron. Then turn the iron in the direction that you want your curls to go.  You can also turn your curling iron into a curling wand, simply by not using the clasp and wrapping your hair around it. When you finish curling a piece of hair, ball the hair up in your fist near your head, which will make your curls hold longer.
Step 5: Keep wrapping your hair around the iron and once your bottom layer is done, you can bring down another layer of your hair, so eventually you have curled all the layers. Once you get the front sections of your hair, I would recommend curling away from your face, which will frame. For the other sections I would alternate curling away and towards your face.

Step 6: If you want loose waves, then finger through your hair. If you would rather have tighter curls, then you can skip this step.

Step 7: Finish your look of by spritzing a little hairspray on your hair, and then you are good to go!

Thanks for reading and please comment below and subscribe to my email list to get emailed when I make a new post :)

 THIS BLOG claims no credit for any images posted on this site unless otherwise noted. Images on this blog are copyright to its respectful owners. The 3 pictures under "my opinions" were taken by me.

Tips and Tricks to Get Up, Ready and Out the Door Fast for School

My high school starts at 7:10 A.M. and I have to leave for school by 6:35! I am always rushing so that I can make it to school on time. It's hard to wake up in the morning, and when you keep pressing the snooze button, you end up having 10 minutes of time to get ready! Here are my tips and tricks on how to get ready for school fast, so you can get the maximum amount of sleep possible! 


Tip #1: Plan your outfit the night before

The night before a school day, I always do a few little preparations for school the next morning, that way I can sleep in a bit more and won't have to worry about doing those things in the morning. I always pick out my outfit the night before, because if I don't, I end up rampaging my closet while trying on different outfits to wear for 20 minutes and then end up wearing the outfit I tried on originally. I always check the weather on my phone for the next day and plan my outfit accordingly. Then I lay all my clothes and accessories out next to my bed, so that when I wake up in the morning I know exactly what I'm wearing and can change in less than 1 minute.

Tip #2: Make your lunch the night before

The night before a school day, I also make my lunch for school the next day, because usually making my lunch takes about 5-8 minutes. Sometimes when I make my lunch in the mornings, I'm out of the foods that I usually put in it so I have to scrounge around the fridge looking for food. If I make my lunch the night before, I can get all that taken care of, and it won't take time out of my morning. Once I make my lunch, I put it in the fridge so that everything stays preserved. I would also always forget to bring water to school, so now I fill it up at night and place it in the fridge right next to my lunch. In the morning I can just grab my lunch and water and leave for school.

Tip #3: Set multiple alarms

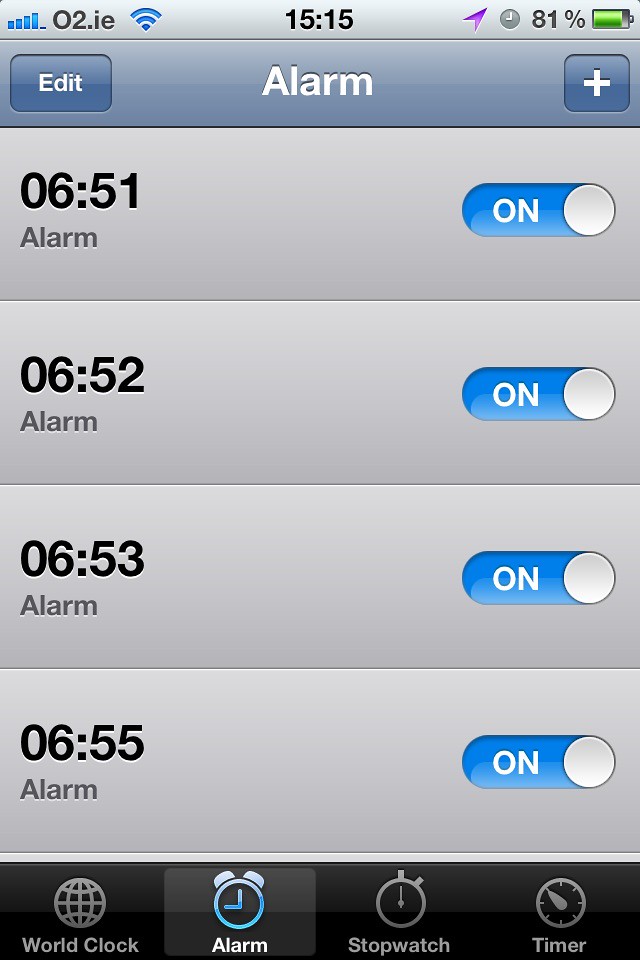
Setting multiple alarms in 5 minute increments will wake you up slower so that you can ease in to waking up. I set my alarms to 5:40, 5:45, 5:50, 5:55 and 6:00 A.M. This insures that I won't sleep through any alarms and that I will actually wake up at my desired time, 6:00. Also, on an iPhone you can write a message to yourself when your alarm goes off. That way, you can encourage yourself to wake up, or write things like "wake up or else your makeup will look terrible".

Tip #4: Check your phone

Once I am on my 2nd or 3rd alarm, I will always pick up my phone from my bedside table and turn off all the alarms. The brightness of my phone screen in contrast to the darkness of my room makes my phone look extra bright. I check some of my texts, email or social media for 2-3 minutes and the brightness of the screen makes my eyes feel less sleepy and more awake. Beware not to spend too much time on your phone though, because you don't want to be wrapped up in your phone and waste all your time!

Tip #5: Splash your face with cold water

Every morning , after I get out of bed, I head over to my bathroom and and after washing my face, I splash it with cold water. This helps me be more awake, so that I will get ready faster and won't still be sleepy and slow while getting ready. 

Tip #6: Drink cold water after waking up

Drinking cold water after waking up will help you feel more energized and awake, and it also kick-starts your metabolism, along with breakfast.

Tip #7: Get in a routine

Get in an everyday makeup routine, where you know the products you are going to use and how to apply them correctly. Every time you do your makeup, you will get a little bit faster, because you will be so used to doing it. The same goes for your morning routine in general. If you always follow the same general morning routine, you will end up getting faster and faster at it, because you will be familiar with it. 

These are all my tips on getting ready fast for school! Please comment below and subscribe to my email list to get emailed when I make a new post :)

 THIS BLOG claims no credit for any images posted on this site unless otherwise noted. Images on this blog are copyright to its respectful owners.

Popular Posts

Popular Posts

Like us on Facebook

Flickr Images